If your WordPress site is not ranking the way you think it should, the problem is usually not your content. It is the technical foundation underneath it. WordPress is SEO-friendly out of the box, but only if it is configured correctly. A WordPress SEO audit finds the issues holding your site back so you can fix them and start climbing.
A WordPress SEO is a systematic review of your site’s technical setup, on-page elements, content structure, and performance signals. It tells you exactly what is working, what is broken, and what to fix first. This guide walks through how to run a WordPress SEO audit step by step, what tools to use, and what to look for at each stage.
TL;DR: A WordPress SEO audit checks your site across five areas: technical crawlability, on-page SEO, content quality, site speed, and structured data. Run it using a combination of Google Search Console, a crawling tool, and manual checks. Fix critical issues first (indexation, broken links, slow pages), then move to on-page and content improvements.
What Is a WordPress SEO Audit?
A WordPress SEO Checklist is a comprehensive review of your WordPress website to identify issues that prevent it from ranking well in Google. Unlike a generic website audit, a WordPress audit focuses on WordPress-specific elements like plugin configuration, theme code quality, permalink structure, and database optimization.
The audit covers five core areas:
- Technical SEO: Crawlability, indexation, XML sitemaps, robots.txt, canonical tags, and site architecture.
- On-page SEO: Title tags, meta descriptions, heading structure, image alt text, and internal linking.
- Content quality: Thin content, duplicate content, keyword targeting, and content gaps.
- Site speed and Core Web Vitals: Page load time, Largest Contentful Paint (LCP), Cumulative Layout Shift (CLS), and Interaction to Next Paint (INP).
- Structured data: Schema markup presence, validity, and rich-result eligibility.
Step 1: Check Indexation and Crawlability
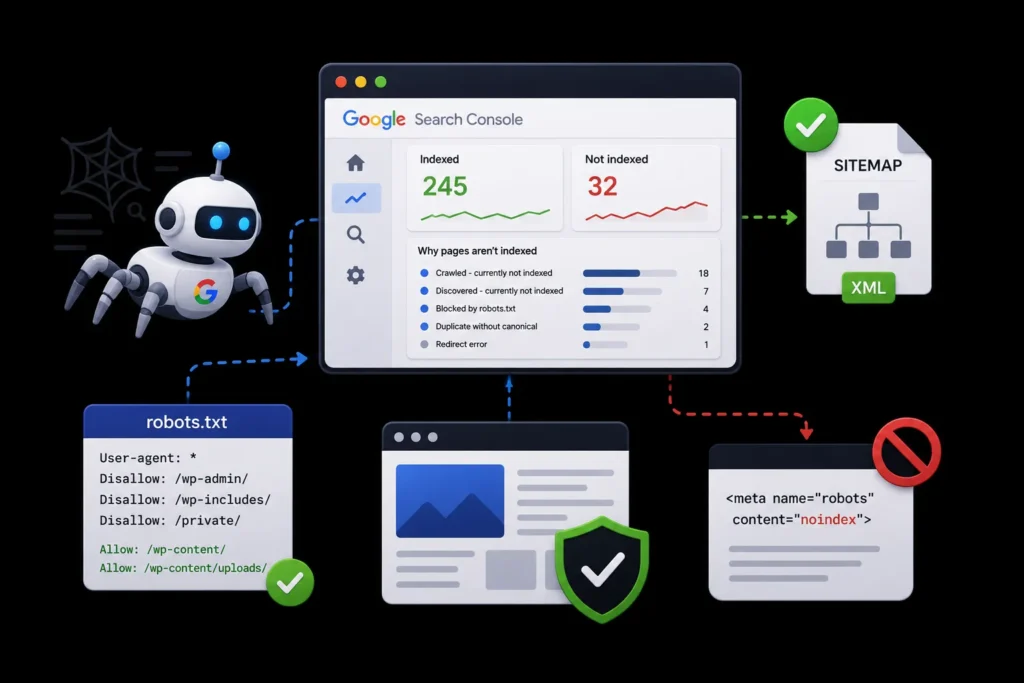
Before fixing anything, confirm that Google can actually crawl and index your site. If your pages are not indexed, no amount of on-page optimization will help.
Check Google Search Console Coverage
Open Google Search Console and go to Pages (or Coverage in older versions). Look for:
- Indexed pages: How many of your pages are actually in Google’s index.
- Not indexed reasons: Crawled but not indexed, discovered but not crawled, blocked by robots.txt, duplicate without canonical, or redirect errors.
- Sitemap submission: Confirm your XML sitemap is submitted and being read by Google.
If a large number of pages are “crawled but not indexed,” it usually means Google does not consider the content valuable enough to index. This points to thin content or low-quality pages that need to be improved or removed.
Check robots.txt and noindex Tags
Go to Settings > Reading in WordPress and confirm “Discourage search engines from indexing this site” is unchecked. Then check your robots.txt file by visiting yourdomain.com/robots.txt. Make sure important content directories are not accidentally blocked.
Also check for stray noindex tags. Some WordPress themes or SEO plugins accidentally set noindex on pages that should be indexed. Search Console will flag these under the “noindex” exclusion reason.
Step 2: Audit Your XML Sitemap
Your XML sitemap tells Google which pages to crawl and how often they change. If you use Rank Math or Yoast, your sitemap is auto-generated. Check the following.
- Sitemap is accessible: Visit yourdomain.com/sitemap_index.xml (Rank Math) or yourdomain.com/sitemap.xml (Yoast) and confirm it loads.
- All important pages are included: Posts, pages, custom post types, and category archives should be listed.
- No low-value pages: Tag archives, author archives, search result pages, and pagination pages should generally be excluded to avoid wasting crawl budget.
- Last modified dates are current: Google uses these to prioritize crawling. If dates are stale, check your sitemap settings.
Step 3: Run a Full Site Crawl
A site crawl simulates how Googlebot sees your site. Use a tool like Screaming Frog (free up to 500 URLs) or Sitebulb. The crawl will surface issues that are invisible from the WordPress admin.
What to look for in the crawl report:
- Broken links (404 errors): Internal links pointing to deleted pages. Fix by redirecting to the closest relevant page using a 301 redirect.
- Redirect chains: Multiple redirects in a row (A to B to C). Collapse them into a single redirect (A to C).
- Missing or duplicate title tags: Every page should have a unique, keyword-optimized title tag under 60 characters.
- Missing or duplicate meta descriptions: Every page should have a unique meta description between 120 and 155 characters.
- Missing H1 tags: Every page should have exactly one H1 tag.
- Images missing alt text: Alt text helps image search and accessibility. Add descriptive alt text to all content images.
- Orphan pages: Pages with no internal links pointing to them. Add links from relevant pages or remove the orphan page.
Step 4: Audit On-Page SEO Elements
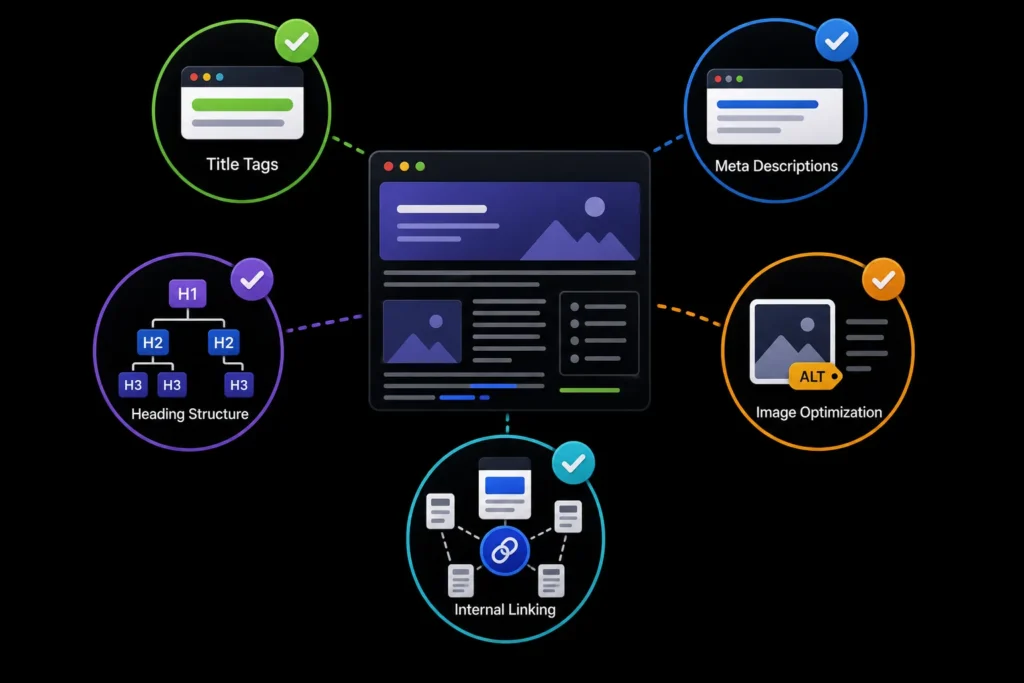
For your most important pages (homepage, top service pages, top blog posts), manually check each on-page element.
Title Tags
Each title tag should include the primary target keyword, stay under 60 characters, and be unique across the site. Check for generic titles like “Home” or “Blog” that waste ranking potential.
Meta Descriptions
Meta descriptions should be 120 to 155 characters, include the target keyword, and read as a compelling description that earns the click. Check for empty descriptions or boilerplate text duplicated across pages.
Heading Structure
Each page should have one H1 (the page title), followed by H2s for major sections, and H3s for subsections. Do not skip heading levels (H1 to H4). Check for pages that use H2s for styling instead of structure.
Image Optimization
Check that images have descriptive alt text, are compressed for file size, and use width and height attributes to prevent layout shift. Use WebP format where possible for smaller file sizes.
Internal Linking
Review your internal link structure. Your most important pages should have the most internal links pointing to them. Check for pages that are only linked from the navigation menu and have zero in-content links. Add contextual internal links from relevant blog posts and service pages.
Step 5: Check Site Speed and Core Web Vitals
Google uses Core Web Vitals as a ranking factor. Run your key pages through Google PageSpeed Insights to get real field data and lab data.
The three Core Web Vitals metrics to check:
- Largest Contentful Paint (LCP): Should be under 2.5 seconds. Measures how long the largest visible element takes to load. Usually an image or hero section.
- Cumulative Layout Shift (CLS): Should be under 0.1. Measures visual stability. Caused by images without dimensions, ads, or dynamically injected content.
- Interaction to Next Paint (INP): Should be under 200 milliseconds. Measures responsiveness to user interactions.
Common WordPress speed issues and fixes:
- Unoptimized images: Install a plugin like Smush or ShortPixel to compress and convert images to WebP.
- Too many plugins: Each plugin adds CSS and JavaScript. Remove plugins you do not use and consolidate functionality where possible.
- No caching: Install a caching plugin like WP Rocket or W3 Total Cache to serve cached pages instead of generating them on every request.
- Render-blocking resources: Defer or delay JavaScript loading for non-critical scripts. Most caching plugins handle this automatically.
- Slow hosting: Shared hosting is often the bottleneck. Upgrading to managed WordPress hosting or a VPS can dramatically improve load times.
Step 6: Audit Structured Data and Schema Markup
Structured data helps Google understand your content and can unlock rich results in search. Check whether your site has schema markup and whether it is valid.
Use Google’s Rich Results Test tool to check your pages. Common schema types for WordPress sites:
- Article or BlogPosting: For blog posts.
- Organization: For the homepage and about page.
- FAQPage: For pages with FAQ sections.
- Service: For service pages.
- BreadcrumbList: For navigation breadcrumbs.
If you use Rank Math or Yoast, basic schema is auto-generated. But check that the schema type matches the page content. A common issue is service pages using Article schema instead of Service schema, which is less accurate for Google’s understanding of the page.
Step 7: Check for Duplicate Content
WordPress can generate duplicate content through tag archives, category archives, author archives, date archives, and pagination. Google may index these instead of your original posts, diluting your rankings.
Fixes:
- Set tag and category archives to noindex: In Rank Math or Yoast, set tags and categories to noindex, follow.
- Disable author and date archives: If you have a single-author blog, disable author archives. Disable date archives unless you run a news site.
- Use canonical tags: Ensure each page has a self-referencing canonical tag. For paginated archives, use rel=”next” and rel=”prev” or let canonical point to the first page.
Step 8: Review WordPress-Specific Settings
Several WordPress settings directly affect SEO. Check these during your audit.
Permalink Structure
Go to Settings > Permalinks. The recommended structure is “Post name” (/sample-post/). Avoid date-based structures (/2026/07/sample-post/) because they make URLs harder to change and add unnecessary length.
Comment Settings
If comments are enabled but you are not moderating them, spam comments can hurt your site quality. Either disable comments or use a spam protection plugin like Akismet.
Theme and Plugin Updates
Outdated themes and plugins can introduce security vulnerabilities and compatibility issues that affect site performance. Keep everything updated, but test updates on a staging site first.
Database Optimization
Over time, your WordPress database accumulates post revisions, spam comments, and transient data that slow down queries. Use a plugin like WP-Optimize to clean up the database periodically.
Next Steps After Your WordPress SEO Audit
Once your audit is complete, prioritize fixes by impact. Start with indexation issues (if pages are not indexed, nothing else matters), then fix broken links and redirects, then address on-page elements (titles, meta descriptions, headings), then improve site speed, and finally optimize content and schema. Tackling everything at once is overwhelming, so work through the list systematically.
If you want a professional WordPress SEO audit with a prioritized action plan, MoxSEO offers WordPress SEO services for businesses in India and globally. Get a free quote to get started.
Frequently Asked Questions
How do I run a WordPress SEO audit?
Run a WordPress SEO audit by combining Google Search Console (for indexation and performance data), a crawling tool like Screaming Frog (for technical issues like broken links and missing tags), and Google PageSpeed Insights (for speed and Core Web Vitals). Check each page’s title tags, meta descriptions, heading structure, internal links, and schema markup manually for your most important pages.
What is the best WordPress SEO audit tool?
There is no single best tool. Google Search Console is essential and free. Screaming Frog is the best crawling tool for WordPress sites (free up to 500 URLs). PageSpeed Insights is the best for Core Web Vitals. For an all-in-one WordPress plugin, Rank Math and Yoast both include built-in SEO analysis features, but they only check individual pages, not the whole site at once.
How often should I audit my WordPress site for SEO?
Run a full WordPress SEO audit at least twice a year, and a quick check of Google Search Console monthly. You should also run an audit after any major change to your site, such as a theme update, plugin change, migration, or redesign, since these can introduce new issues that affect rankings.
How long does a WordPress SEO audit take?
A basic audit of a small site (under 50 pages) takes 2 to 4 hours. A comprehensive audit of a larger site (100+ pages) can take 1 to 2 days, including the crawl, manual page reviews, speed testing, and prioritizing fixes. The actual fixes take longer, depending on how many issues are found.
Can I do a WordPress SEO audit myself?
Yes, if you are comfortable with WordPress admin, Google Search Console, and basic HTML. The main steps (checking indexation, running a crawl, reviewing title tags and meta descriptions, testing page speed) are all learnable. If you find technical issues you are not sure how to fix, or if your site is large and complex, a professional WordPress SEO audit from an agency like MoxSEO can save time and catch issues you might miss.

Samruddhi Kadam is an SEO Associate at MoxSEO with 2 years of experience in keyword research, on-page SEO, content optimization, competitor analysis, and website performance tracking. She focuses on improving organic visibility, creating search-friendly content, and identifying practical opportunities to strengthen rankings. Through consistent analysis and data-driven execution, Samruddhi helps businesses attract relevant traffic and build a stronger presence in search results.